Frequently Asked Question
How To Map Network Drive(s)?
Last Updated 11 years ago
1) Connect to the 'Oakwood' server via Remote Desktop Connection.
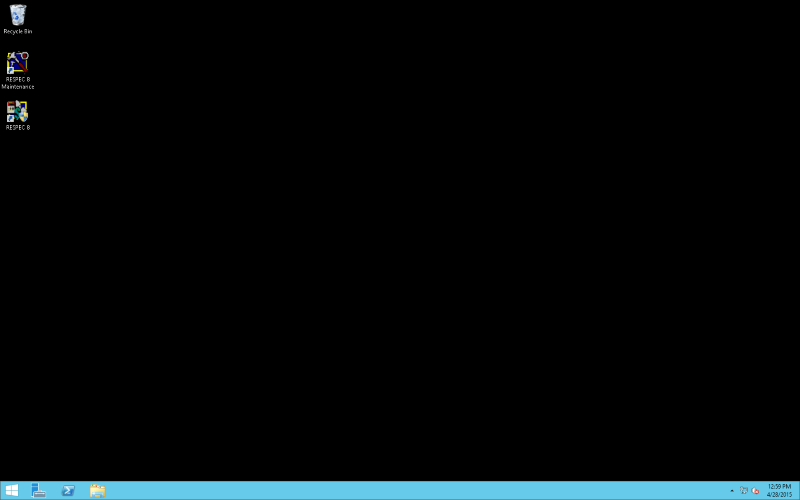
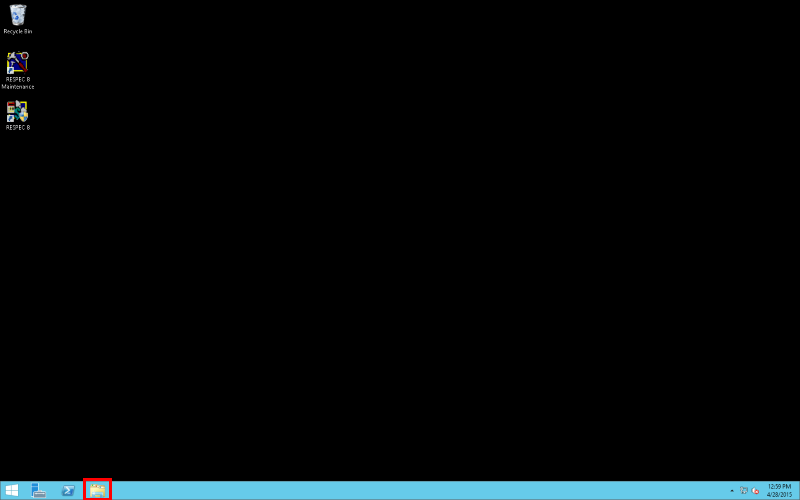
2) Click on the folder icon (windows explorer), highlighted with a red outline below.
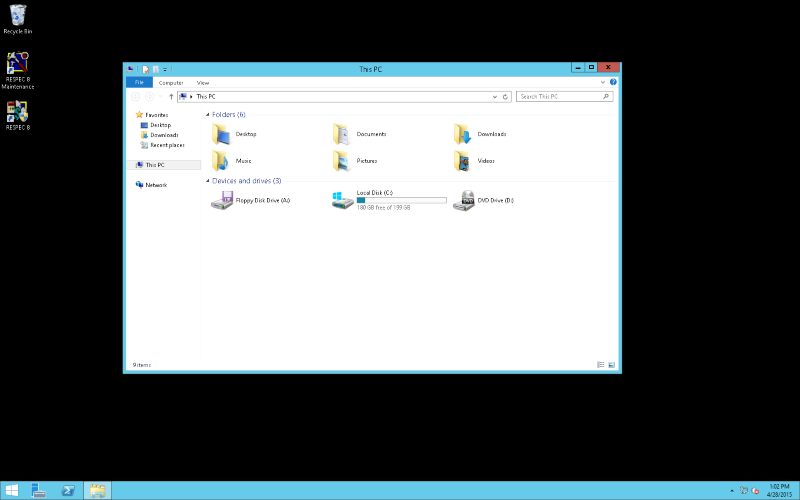
3) Your screen should now look like the picture found below:
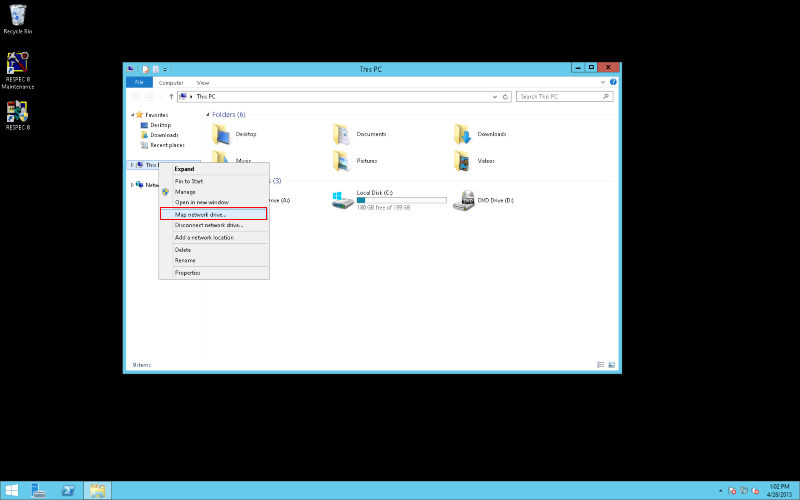
4) Find "This PC" on the left-hand navigation bar and RIGHT-CLICK on it and select 'MAP NETWORK DRIVE' from the selection menu.
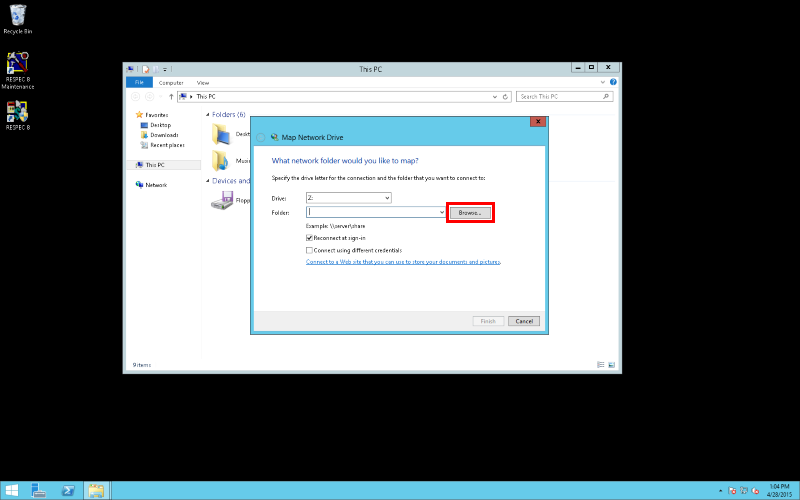
5) Your screen should now look like the image below, click on the 'BROWSE' button.
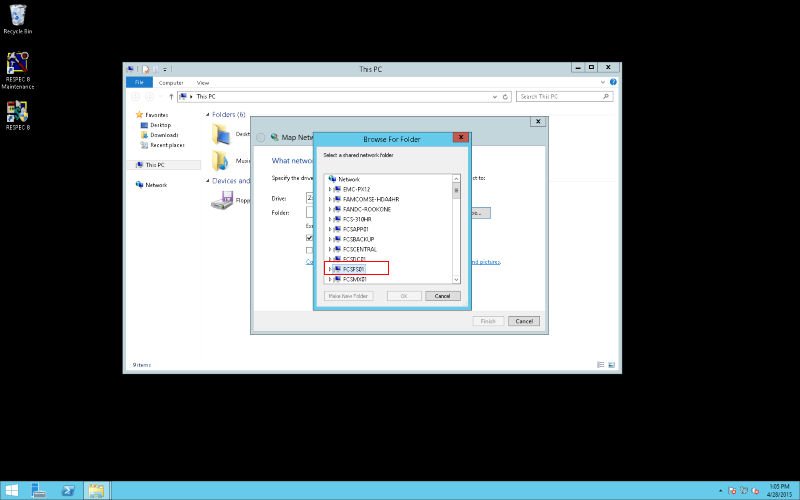
6) Now the browse for folder screen should display. Click on the Network icon and let it scan the network. Once computers start showing up look for "FCSFS01", this stands for "F&CS FileServer 01".
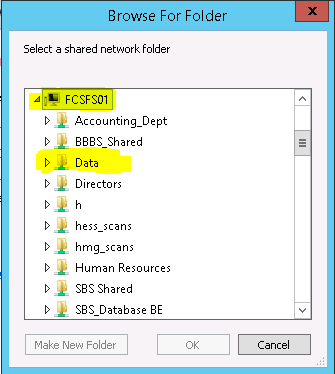
7) After finding and clicking on the computer FCSFS01, it'll bring up a bunch of networked folders like the picture below. Look for the DATA folder and click on it to show its contents. (Highlighted below)
8) For this example we'll pretend we're a program manager and trying to add the program managers drive. So within the DATA folder is many various folders, the program managers drive is in a folder called TRAINING and within that is the PROGRAM MANAGERS folder.(As shown in picture below)
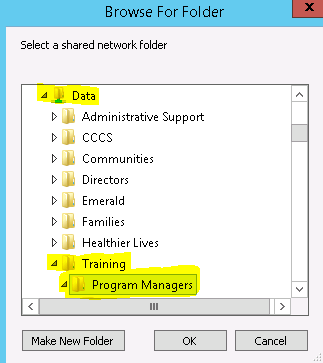
9) We'd highlight the PROGRAM MANAGERS folder and click on the OK button. Your screen should now look like the following image:
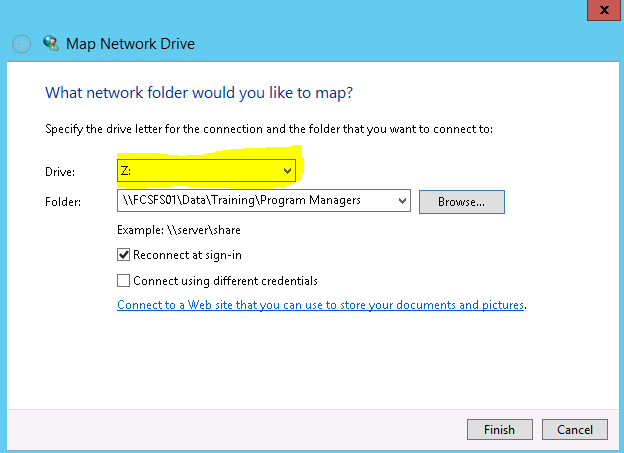
10) You can now click the FINISH button or (optional) you can change the drive letter this network drive will be assigned on your computer. This is optional and in no way affects your access to the network drive. We typically just leave them at Z, next one will be Y, following after that the next drive you add will become X and so on.
11) THAT'S IT! YOU'VE JUST ADDED A NETWORK DRIVE WITHOUT NEEDING ANY OF US I.T. GUYS OR PUTTING IN A TICKET! PAT YOURSELF ON THE BACK! WELL DONE.
2) Click on the folder icon (windows explorer), highlighted with a red outline below.
3) Your screen should now look like the picture found below:
4) Find "This PC" on the left-hand navigation bar and RIGHT-CLICK on it and select 'MAP NETWORK DRIVE' from the selection menu.
5) Your screen should now look like the image below, click on the 'BROWSE' button.
6) Now the browse for folder screen should display. Click on the Network icon and let it scan the network. Once computers start showing up look for "FCSFS01", this stands for "F&CS FileServer 01".
7) After finding and clicking on the computer FCSFS01, it'll bring up a bunch of networked folders like the picture below. Look for the DATA folder and click on it to show its contents. (Highlighted below)
8) For this example we'll pretend we're a program manager and trying to add the program managers drive. So within the DATA folder is many various folders, the program managers drive is in a folder called TRAINING and within that is the PROGRAM MANAGERS folder.(As shown in picture below)
9) We'd highlight the PROGRAM MANAGERS folder and click on the OK button. Your screen should now look like the following image:
10) You can now click the FINISH button or (optional) you can change the drive letter this network drive will be assigned on your computer. This is optional and in no way affects your access to the network drive. We typically just leave them at Z, next one will be Y, following after that the next drive you add will become X and so on.
11) THAT'S IT! YOU'VE JUST ADDED A NETWORK DRIVE WITHOUT NEEDING ANY OF US I.T. GUYS OR PUTTING IN A TICKET! PAT YOURSELF ON THE BACK! WELL DONE.